Saturday, December 31, 2011

Crayon Rolls

We have a few little cousins, nieces and nephews that we love to give gifts to. I found a tutorial for these cute crayon rolls and knew that they were going to be perfect! The tutorial shows a felt flower on the front, but I decided to change that as I had some very cute patches at home.
I made two of these exactly the same, one for my 3 year old nephew and the other for my 3 year old cousin. I love the monkey patch!!
This is the inside and I found ribbon that was perfect!! The ribbon is used to stabilize the top of the crayon pocket so that it doesn't stretch.
All ready to go!!
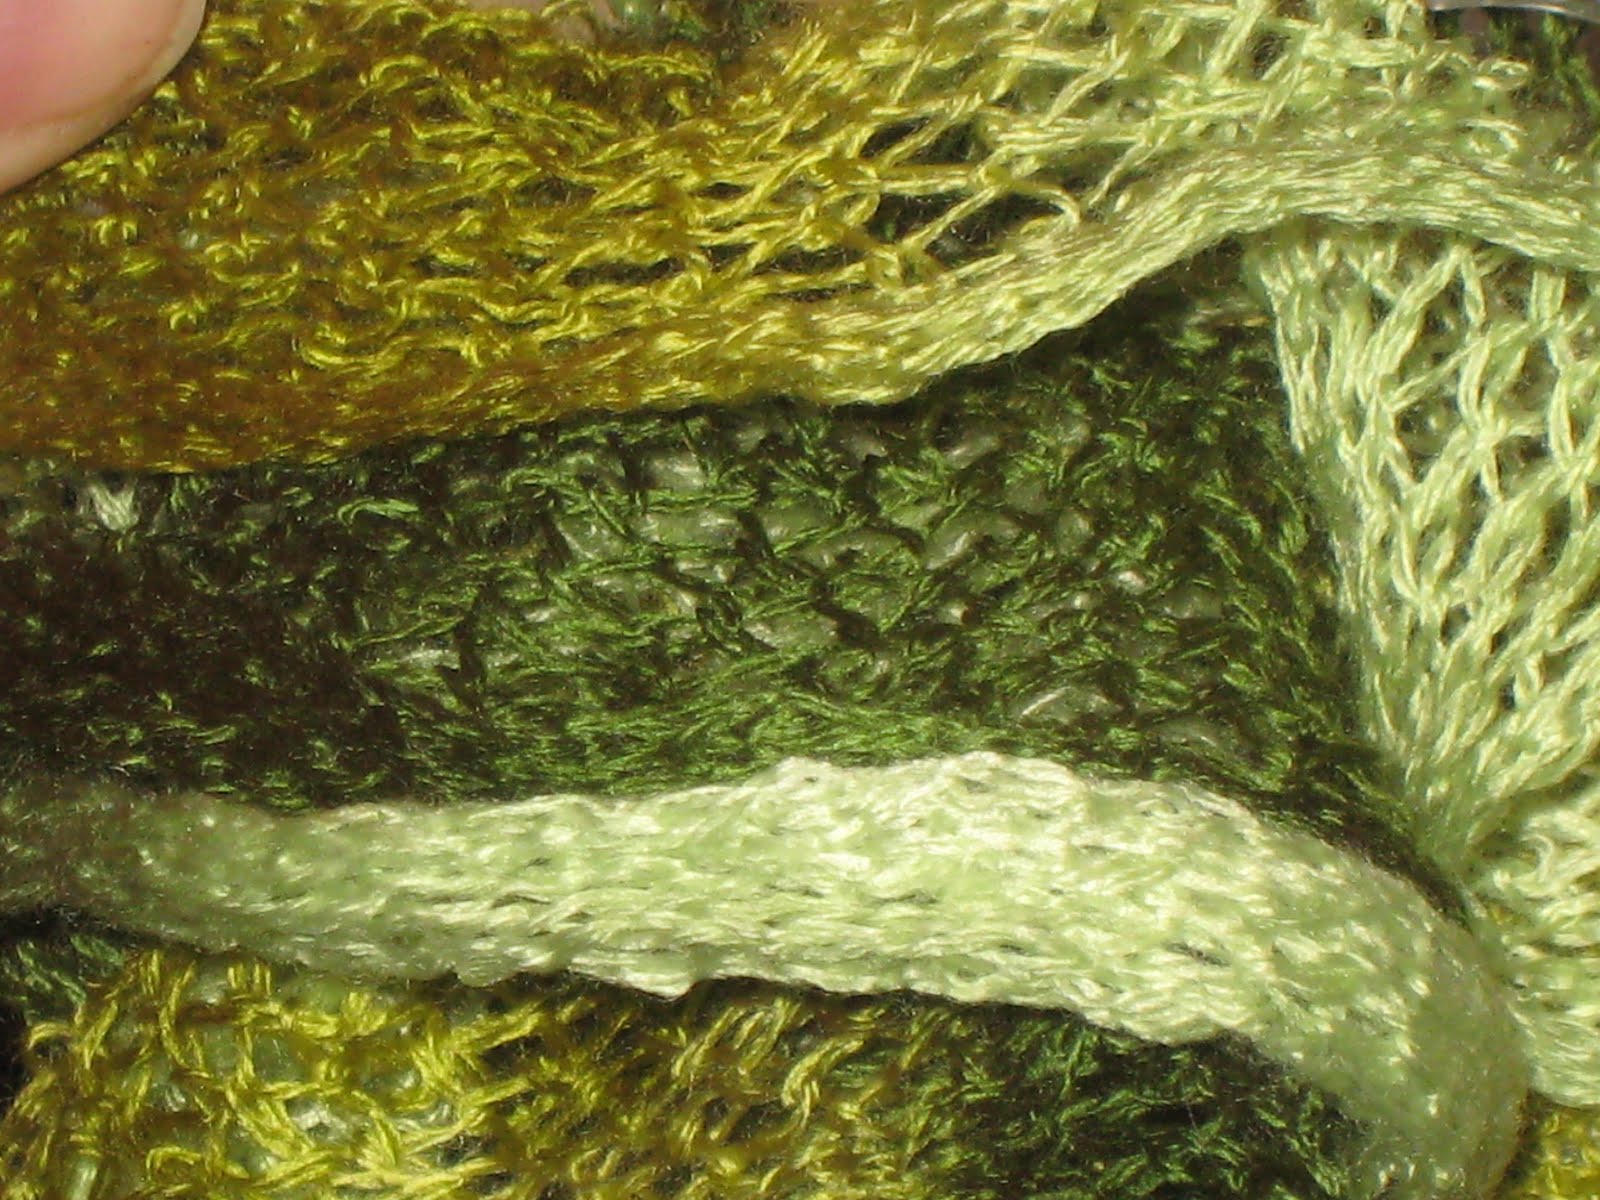
This one was for my 5 year old nephew. He loves all things dinosaur and green is his favorite color.
This is how it looks before it is rolled up.
Inside ribbon :o)
One for another 3 year old nephew. I forgot to take a picture of the inside of this one. This patch was slightly harder to stitch around than the others.
For my 10 year old niece. She is such a sweetie!! Her favorite colors are purple and pink and I thought this was just perfect for her!! Love the smiley face button!
The outside before it is folded.
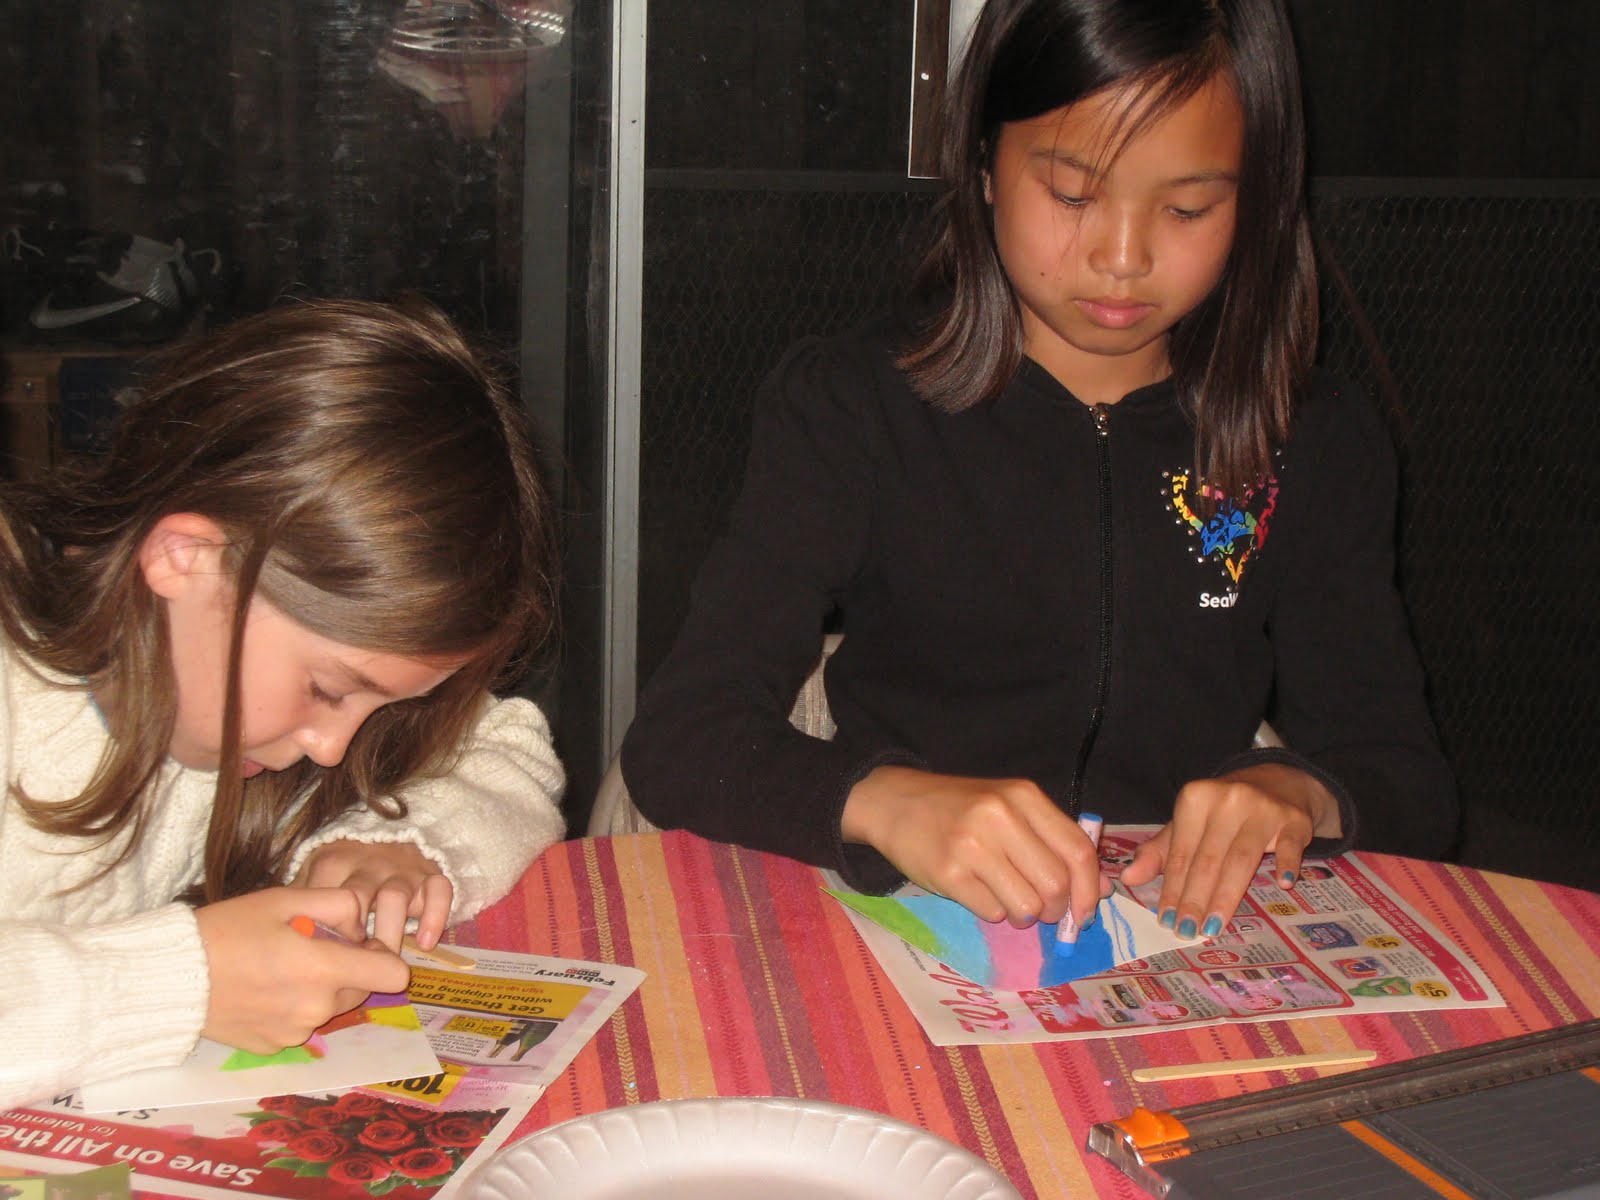
For this one, we used gel pens instead of crayons. I think my niece will like these much better.
The ribbon that I used for this one.

Take a look at Tami's blog for more great crafting finishes by some very talented people!

Wednesday, December 28, 2011

Flounce Scarf

This is the start of a flounce scarf for the 16 year old. At first I really found this "yarn" to be extremely fiddly and did not enjoy it at all, but now it is growing on me. I love the outcome - it does really make a statement and after awhile you do get used to knitting with it.
I used this link from youtube to cast on and see how to actually knit. I found it very helpful.
The "yarn" really is fun to look at as it curls and ruffles up all on it's own :o)

Take a look at all the other WIPs in progress from Tami's blog - some of them are quite inspiring!


Friday, December 23, 2011

Fingerless Gloves

My first foray into knitting gloves, albeit fingerless ones was somewhat of a success. I'm not sure I enjoyed it enough to knit more of these babies, but I do like them.
Four girls will be very happy this Christmas!
This ball of yarn only cost $1 and I have quite a bit left over.
These are the first ones that I knit. As usual with me, the first glove needed to be taken out a few times before I got the hang of it. Then after it was complete and I put it on, I realized that there were HUGE holes between the fingers. Bummer!! I put it aside and started the second one. That one went a bit better, no holes, but one of the fingers is slightly shorter than all the rest. I fixed the finger problem and went back to the first one and sewed the holes shut. They are fine now, but boy, the finishing took quite a bit of time!
These are sparkly and blue and I know my 16 year old will simply love them!
These are my favorites! I like the crazy colors and they are very soft. Can't wait to see if the recipient likes them as much as I do.
All stacked up!
Only a few more sewn items and I will be done with gifts!!!

Friday, December 16, 2011

Tunisian Crochet

This is for the FO Friday over at Tami's blog. I hope that this will keep me on track to finish up some items so that I can post over there. Some really, really talented people are taking part of this.

I tried my hand at some tunisian crochet and decided that I really liked the look of the stitch that is made. It is really cool how this actually works!!
I embarked on a scarf making mission. I thought both my sons would love to have a handmade scarf from mom. I quickly chained 21 and went along my merry way. WELL.....tunisian crochet all on it's own curls up really, really badly. I was so disenchanted, I didn't even take a picture. I googled and found that if you do a row of tunisian purl stitch at the beginning, that should take care of the curling problem. I tried that with 4 chains and it worked like magic. Can you guess the story is not quite done yet? I quickly pulled that out and chained 21 again and went along with just the one purl row. It curled again!! Pulled it out, chained, did 2 rows - no dice - lots of curling. At 4 rows of the purl stitch it pretty much held it's shape and I was pretty happy. Crocheted until it was long enough, did 4 more rows of purl stitch and was done, or so I thought. Now the ends just flipped over. HMMM...I decided to do two rows of single crochet around the entire thing. Magic happened - no curling and no flipping!!
Close up of the stitch detail. Just love the straight up and down stitches!
Started: First part of November
Finished: 12/8/2011
US9 Tunisian Crochet Hook
Yarn: Sensations It's a Wrap
Color: #3 Taupe
Lot: F1021
Chained 21 stitches to begin - 4 rows tunisian purl stitch-regular tunisian stitch for the rest-ended with 4 rows tunisian purl stitch-2 rows of single crochet around the entire scarf.
Dimensions: 66 3/4" X 6 1/2"
These are fingerless mitts. I thought the 11 year old boy would enjoy these.
Chained 26 to start-4 rows tunisian purl stitch-13 rows regular tunisian stitch-4 row tunisian purl stitch. I did not apply the single crochet around the mitts.
Dimensions: 7 1/4" X 6 1/4"
My hand modeling one of the mitts. They feel very comfortable. I hope my son likes them :o)
Scarf #2 for 6 year old son.
Same pattern used
Same hook used
Yarn: Caron Simply Soft Paints
Color: 0009 Sticks & Stones
Lot: 55506
Dimensions: 44 1/4" X 6 1/4"
Stitch detail.
Younger son's mitts.
Dimensions: 6 1/2" X 5 3/4"
Now to finish up the mitts for the girls!!!

Tuesday, December 13, 2011

Soup Knitting

Not actually knitting soup, but it has just felt a lot like soup weather so I have been making oodles of soup. I have also been knitting up a storm and boy does it feel good!!
My oldest daughter is taking a photo class and was trying out some artsy ways to take pictures of my scarf. It sure looks a lot better than what I usually do :o)
This scarf is really pretty. I love the way the sequins catch the light when I'm wearing it, but they are a tad scratchy. I wear it all the time anyway!
Yarn: Bali #4 from the Great Adirondack Yarn Company
Color: Paprika
This was a multi strand yarn. There were three different strands all in the hank together. I carefully wound the ball from the hank and discovered that all the strands were not the same length. I tried to compensate for this and thought I had done a pretty good job until I got about 3/4 of the way through the ball of yarn. One of the strands, the thickest one, was significantly longer than the other two. As I was knitting, I kept "inching it down" the other two, but eventually it got so tangled up I couldn't go on. I wound up having to separate the strands at the end farthest away from my knitting and wind them up separately, unknotting as I went along. This was extremely time consuming. But, when all is said and done, it turned out fine. It's a little shorter than I prefer (note to self: one skein scarves could sometimes use an extra skein), but it looks fine.
Needles: US 15
Start: 11/21/11
Finished: 11/29/11
Cast on 10 stitches and knit every row
Finished measurement: 46" X 4"
This next photos is my new favorite soup. I found the recipe at the Yarn Harlot and it's called "Emergency Soup".
She used leeks, but I didn't have any so I put in my shredded zucchini and crookneck squash (2C) worth from the garden this summer. I also added a bit of broccoli - OOOOHH This is super yummy!!

Tuesday, November 29, 2011

Seasons Sampler Update

I seem to have gotten a wee bit of my stitching mojo back and it feels good. This is the Autumn portion of the Seasons Sampler from Novalee02. I am simply in love with these colors and the way this is stitching up.
Here it is in all it's glory so far. I can't wait for the next installment for winter so I can finish it, frame it and hang it up!
Now to work on that dreaded Christmas stocking for my oldest that has been taking FOREVER!!

Monday, November 7, 2011

Romantique Sampler

Finally, I have finished sections 18, 19, and 20. Only a month or so late. I am so hoping that I have not completely blown it and that the designer will send me the last installments. Stitching this has been quite a bit of fun, but also a LOT of work. I am a very slow stitcher so each section takes a long, long time.

I seem to have fallen off the face of the earth in terms of blogging and even being a part of any of the stitching and knitting groups that I have been a member of. I have been in quite a bit of a slump - just a little bit down - and not very motivated on any front. I do have some fun things to share and I will get around to doing that. I have also had my fair share of disappointments and failures which I will also share. I am feeling quite a bit better now and hope to get back into a regular blogging routine as well as participating in my groups. I truly enjoyed the groups and touching base with others that like doing the same things I like doing. Until later.

Sunday, July 31, 2011

Slow stitching & baking

Finally!! The Summer installment of this sampler is done! We went on a camping vacation for 10 days and it was very hard to stitch on this. I truly did not want to get it dirty and camping by nature is very dirty :o)
Anywho, it is done now but with a pretty glaring error. The taller flower should be at the same height as the other full flower. I didn't notice this until I was stitching in the butterfly trail and by then there would have been quite a bit of pulling out. I just decided to leave it as is and make the stem longer. I'm not quite sure I like it this way and will decide at a later date if I should take it out and redo or leave it as a "design element".
Spring and Summer together. I can't wait for Fall - these are really nice patterns!
Something else I have been getting into is baking "real" bread. "Real" bread to me is bread that uses yeast and does not use a breadmaker. I have been wanting to do this for a very long time, but the thought of using yeast and getting everything the right temperature and kneading and all that was pretty daunting. A friend of mine awhile back was raving about this book so when I saw it at the library, I decided that I would give it a go. Well.....it is AMAZING!! Very clear instructions and super easy to do....
Here is the dough rising. This is for four 1-pound loaves. Let it rise for a few hours, put it in the fridge for a while longer...
Pull off enough for one loaf of bread and put the rest back in the fridge for another day...shape and let rise for 40 minutes...
And PRESTO!! Bread. This is the very first loaf in the book, since then I have made many more loaves including a peasant bread recipe and olive bread. I can see that this is going to become super additive. All the kids, me and my husband love, love, love bread and this bread is super yummy! I would highly recommend this book!!

Tuesday, July 12, 2011

Zucchini & Crookneck Sqush - what to do??

My garden runeth over with zucchini and crook neck squash. I am running out of ideas of what to do with all of them!!
I baked 10 breads two nights ago. 4 of them are from bananas that were past their prime, but the other six were from crookneck squash. Last week I made 6 loaves of zucchini bread and they have disappeared - it's MAGIC!
4 loaves of banana bread - I know boring compared with the others :o)
2 loaves of chocolate, chocolate chip crookneck squash bread
2 loaves of regular crookneck squash bread and 2 loaves with chocolate chips in them.
These are just out of the garden this morning with more on the vine. We have eaten them raw, fried, in salad, with pasta, with chicken....given gobs away......now what??? My freezer can only hold so many loaves of bread along with the other food stuffs that we need! Any ideas.....?

Sunday, July 10, 2011

Summer fun & Romantique Sampler

WHEW!! These last 2 parts of the Romantique were finished last night. The due date is today! Why am I always cutting it so close?
Part 13
Part 12-my favorite part so far!
Romantique Sampler in all it's glory. I get the next two parts today :o)
Summer has been so much fun. We have just been hanging out and having a blast. It's been great to just follow along with what the kids want to do! Here J is having fun building with his blocks. He spent a whole day on this.
This is a fun craft I have been wanting to do with the kids for awhile. Use oil pastels (crayons work just as well, I just had these lying around) and cover a sheet of paper completely with big blocks of different colors.
Use black acrylic paint and paint over the entire thing, then before it dries, use a popsicle stick and draw your design. If you make a mistake, not a problem! Just run your paint brush over the paper to "erase" your mistake a go at it again :o) We did this for almost an entire day they loved it so much!
13 year old saying. Pretty cool huh?!
Shrinky dinks
They never got tired of watching these shrink up in the oven! We did this on and off for three days straight - all of the kids - it's nice when everyone has fun doing the same things. Other than crafts, we have had so much fun camping, going to the beach and spending oodles of time at the library. I LOVE SUMMER!!