Showing posts with label Noon Art. Show all posts

Friday, September 7, 2012

Noon Art - Little Treasure Boxes

A new school year, a new noon art.  I organize (with the help of some amazing ladies!) noon art every other Thursday at our elementary school.
 We set up the tables - 9 of the 6 foot variety and lay out all the necessary supplies.  This year we made tablecloths to cover the tables and boy what an improvement that has been!!  Now when the glue gets all over the place, instead of having to scrub and scrub and scrub the tables, we just pull the tablecloths off, bring them home and throw them into the washing machine - easy, peasy!
 Lots of sequins, beads, markers - can't go wrong with sequins!
 Someone donated these little "specimen" containers for noon art.
 The kids loved this activity.
 Boys and girls alike - we had as many boys as girls in attendance.  That has been my goal the past two years since I started doing Noon Art -- to find projects that would appeal to both boys and girls equally and it has to be something that grades 1 through 5 can do in 20 minutes.  WHEW!!
 Lots of sparkle on this one :o)
 More than 100 kids came.  Many of them made several of the boxes - we went through about 350 of those little boxes.  It was fast and furious in Noon Art this day!
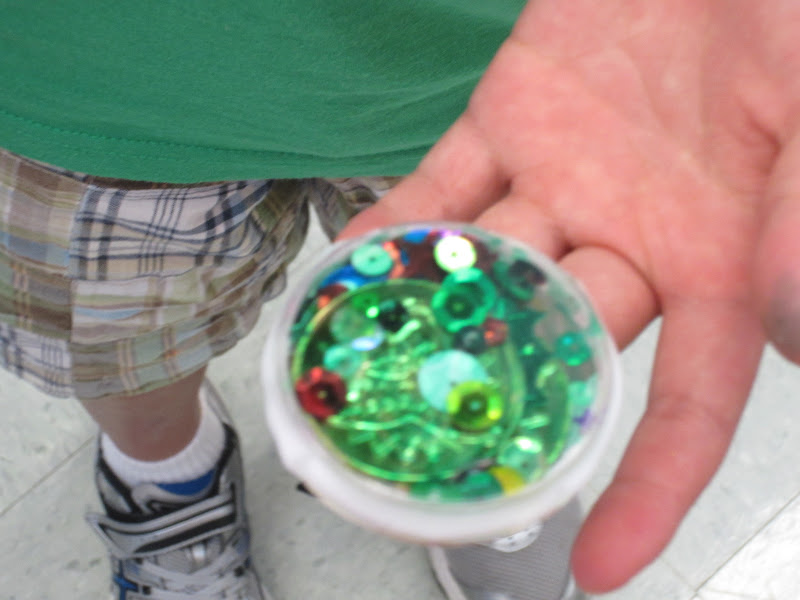
 This boy made about 12 of the boxes - he made one for all his siblings, parents and grandparents and of course the custodian - how sweet!
 If a little glue is good, more is better :o)
 We also put out left over Mardi Gras coins from a party my friend had thrown.  We absolutely did not anticipate how popular those were going to be.  One huge box of coins - GONE.
 So sweet.
 This girl thought she had "made a mistake" on hers and came to me in tears.  I asked her why she thought she made a mistake and she told me because she had glued things on the inside of the box.  I let her know that there are no mistakes in art - you can do whatever you want and it's perfect.  Then I asked her if she would like to make another and she nodded her head and got back to her art - glueing things on the insides of her boxes.
 This is one of my son's boxes.
 This is another - he loves to make 3-D stuff.
 I love the combo of pen and glue on this one.
This one is interesting - the student colored on the bottom of the box a solid color and then drew balloons on the top - you can't really tell here, but it does give a good shadow box appearance.  I tell you, these kids are fabulous!!  I love laying out supplies and seeing where their creativity will take them.

I can't wait for the next one!

Saturday, May 26, 2012

Noon Art

I have been lucky enough to be able to lead noon art at our elementary school this year and it has been sooooo much fun!!!  Every other Friday myself along with a few other volunteers have introduced an art project and the kids have loved it.  We have reached anywhere between 175 to 250 students each noon art and it feels great - not to mention how much it relieves the pressure of an overcrowded playground!
 Yesterday, the project was friendship bracelets and although the prep was very time consuming, it was so worth it!  The kids had a great time.
 They were all over our MP room not to mention outside making bracelets galore!
 Here are even more up on the stage.  The funny thing is that we had as many boys as girls!!  Fabulous!
 These are zoomers - you wind them up, pull the strings on either side and watch them spin.  So much fun!
 A picture of the tables after they cleared out a little.  Before this, you couldn't even get through to the tables.
 Ball and cup game.  They decorated the outside of a toilet paper tube, attached the ball and string and away they went.
 Journal making.  These are made from the covers of cereal boxes folded inside out.
 An example made by one of my kids just for show and tell.
 Totem pole making - another huge hit!
 The kids are super creative!

We did so many other things like:  pet rocks, weaving, maze making, seed cups and so much more!!  I had so many ideas, I couldn't use them all.  Well....I signed on for another year for this volunteer position!!  This is right up my alley.  Maybe I should be an art teacher when I grow up.....

Tuesday, May 8, 2012

Tuesday Tallies and Noon Art

I don't have very much to show for my hexies this week.  I managed to finish two.
 This one, made with some of the leftover yarn from my linen stitch scarf.  I actually really like embroidering on these.  It is a little fiddly - I do it before the hexi is stuffed and closed so I have to get the needle inside that little thing, but I think the effect is worth it.
 This hexi is made with size US5 needles and dishcloth cotton.  I had a vision of my blanket having many different sizes of hexis - the abundance would be the tiny ones with the larger ones scattered about.
 I actually "hate" the bigger one.  It is very wonky and I don't think it is very cute at all.  It is also not the right size to easily fit two of the smaller ones to a side to easily add it to the blanket.  Oh, well!  Gotta try new things once in awhile.
 This is a piece of cardboard that was cut off a box.  I save these along with all cereal box cardboard and any other cardboard that is flat and not too thick.
 These types of cardboard make great patterns and can be used for many, many crafts.  I am the lead for noon art at our elementary school and each craft has to work for approximately 275 students aged 6 years to 11 years old.  That is a huge range in terms of ability!!  Here I am prepping for friendship bracelets.  First, you need to cut out circles - I traced around a juice glass for the circle.
 Stacks of circles
 More stacks
 There are over 300 in this box.  Some of the children will want to make more than one and I want to encourage them to be as creative as possible.  After the circle are cut, a hole needs to be placed in the center of the circle...
 Then, eight half inch slits need to be cut into the outside of the circle.  After that, seven 24 inch lengths of thread (or yarn - I prepped both) need to be cut and knotted together - place the knot into the hole in the center of the circle and then separate the 7 strands into the different slots.  Then they are ready to be used.  I will post again about how to do the actual friendship bracelets soon, but a google search will tell you all you need to know :o)  They are quite easy (once they are prepped!!)
 These are the first ones that were prepped.
 300 prepped and ready to go - you can see that some are made with embroidery thread and some are made with yarn.  I am going to try to encourage the younger kids to use the ones with yarn because they will see results much faster.
Extra forms just in case - I will also bring yarn and thread.

This prep takes quite awhile and is why I have not gotten my hexis for the last couple of weeks done.  Now I will be able to keep up with my hexis - I won't be able to "catch up" but I should be able to get my original goal of 7 per week done.  Let's see if I can do it :o)  Or if something grabs my attention!!